Mindbody-Cliniknote Integration Setup Guide
Getting Started with Cliniknote
- To get started, sign up for a Cliniknote trial account.
- This will send you an email to verify your email address as a 2 Factor Authentication that it is you. To proceed, click on the ‘Verify’ button in the email you receive.
- Login to your Cliniknote account by going to the sign in page enter your email user and password. Bookmark the Login page for easy future access.
- Feel free to explore the trial version of ClinikNote to setup a few patients and record some notes to see how easy it can be. Use the knowledge base articles for instructions in how to do so.
Setting up a Mindbody Integration
Please note that you will need to have an active ClinikNote subscription and also have access to the Owner account in both Cliniknote and Mindbody to complete an integration. To activate your cliniknote subscription, please follow the knowledge base article on how to do so.
- When ready to commence an integration with your Mindbody data, navigate to the ClinikNote Settings page and click on Integrations
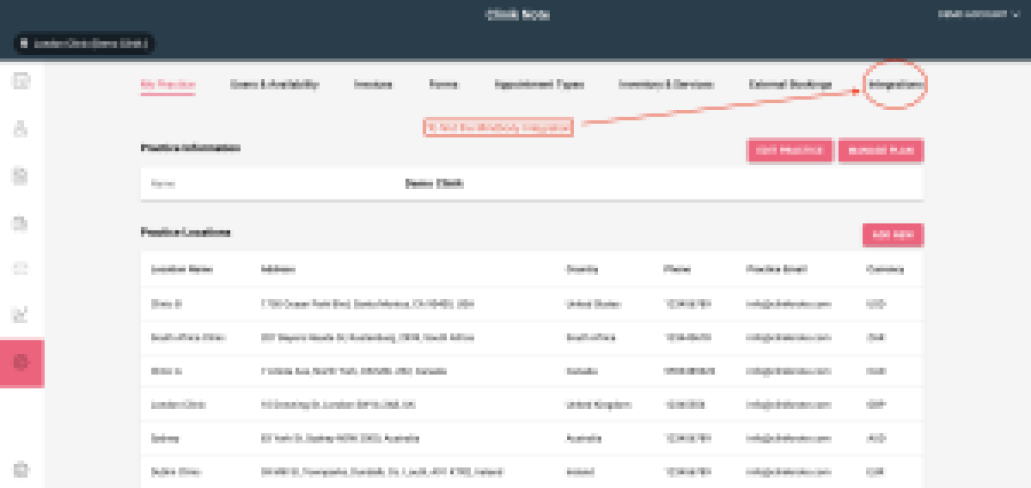
- This will check for an active subscription and request you subscribe to commence an integration with MindBody if you are not already subscribed. Click on “Manage Plan” in setting to subscribe if you are not yet actively subscribed
- With an active subscription, return to Integrations and select a ClinikNote location to integrate with your Mindbody site. Click “Start Integration” to begin.

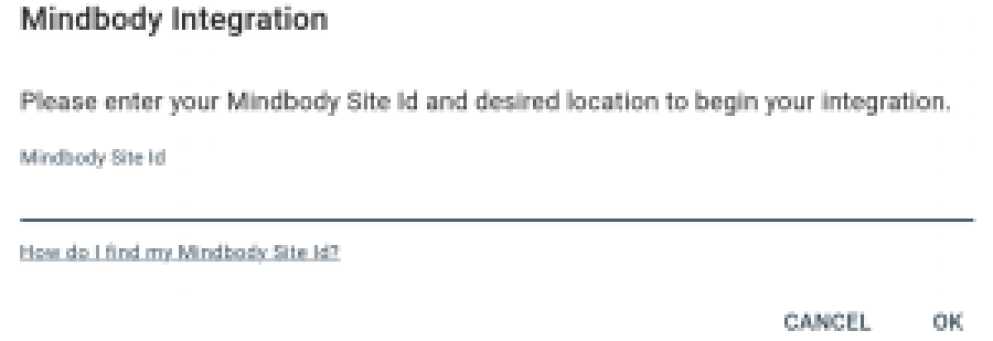
- Enter your Mindbody SiteID in the prompt that appears. You can click the link underneath to see how to find your siteID if unsure.
- An email will be sent to you. Click the button shown below to proceed with integration

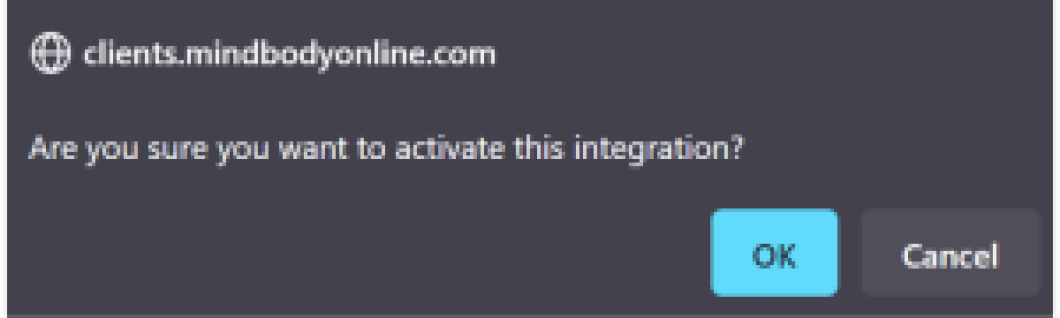
6. Select “Staff sign-in” and then login with the MindBody Owner account to proceed. Once logged in, you will be prompted to
activate the integration. Click “OK” to proceed.
7. You will then be shown the screen to enter your unique activation code contained in the email you received. If it doesnt automatically
populate, copy the unique code and paste it into correct box and hit Submit.
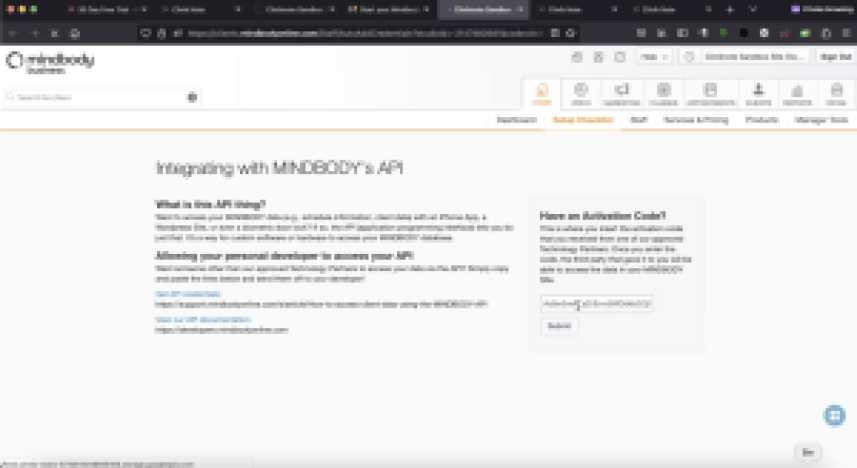
This allows Cliniknote to access your MindBody data.
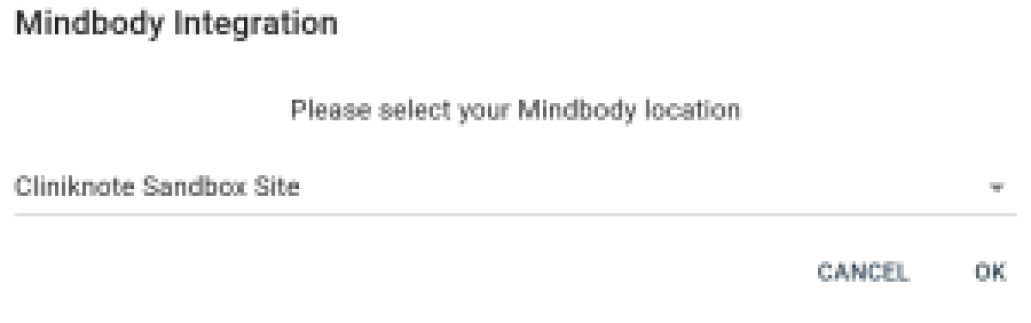
8. Now return to your Cliniknote Integrations page and click on “Complete Integration” next to the location you selected.
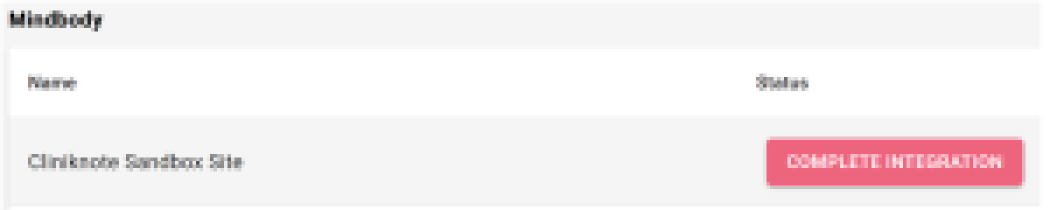
If you have only 1 available Mindbody location to integrate with, we will now link Cliniknote to your Mindbody data. If you have more than 1 – please select the appropriate location from the dropdown menu and then click “OK”.
For any additional locations, you only need to repeat step 3 and then select your next Mindbody location if additional are available.
9. Before you proceed to use the features the integration gives you, go to the settings page and click on your location. If you wish to display your email and ABN / Business Tax Number on the invoices that the integration can generate, scroll to the bottom of the location details and enter your email and ABN / Business Tax Number.

10. In addition, on the settings page you can upload your company / business logo that you wish displayed on your invoices.

Related Topics
.png)


